Configuring Notifications
In Design Studio, the Workflow Designer allows users to create a workflow including adding Notifications. For a comprehensive guide, please refer to the Workflow Automations section. After creating a workflow, users can view and modify existing notifications from either of these locations if the workflow is enabled or set as default.
-
In the Workflow Designer, by adding a Notification automation to an action.
-
In Design Studio > All Apps or from within a specific app (i.e., Design Studio > Incident > Notifications).
Note: You can't create new notifications in the Design Studio > {App} > Notifications section, but you can modify existing notifications. To create a new Notification, refer to Workflow Designer > Workflow Automations.
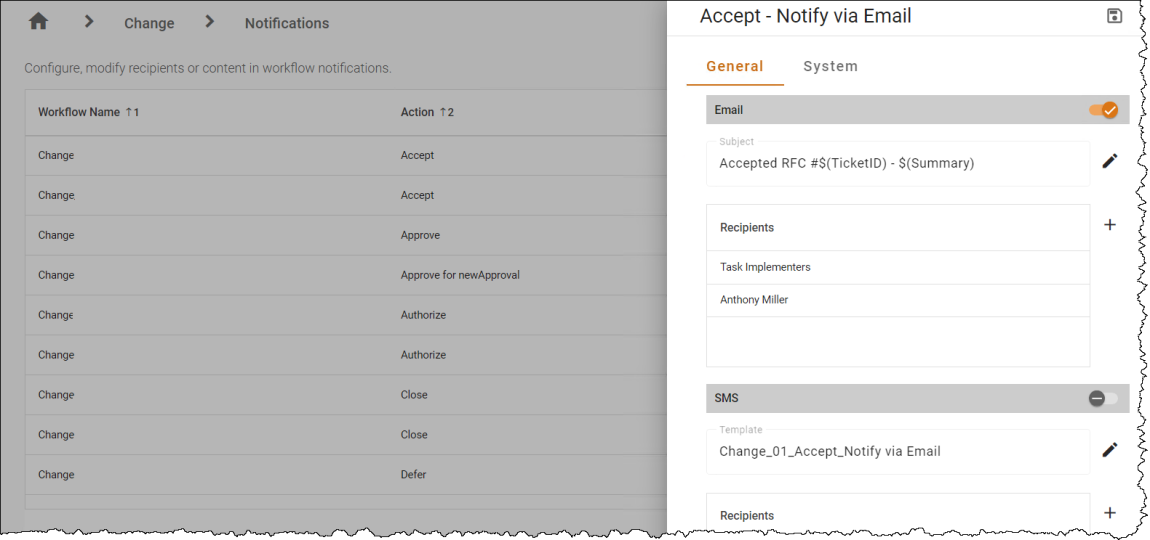
Configuring Notifications
Configuring notifications allow you to customize the appearance and behavior of notifications based on the action performed. These rules can be configured for email and for SMS. You can enable notifications, modify recipients, and disable notifications.
To modify a notification:
-
In Design Studio, navigate to the desired app and select Notifications.
-
Double-click the notification, or click the Pencil
 to the right of the notification to view available options.
 -
To enable the email notifications option, select the toggle next to Email.
-
Click the Pencil
next to the communication template to customize the contents of the notification. See the Communication Templates topic for more details. -
To add recipients, click the + to the right of Recipients. Select a user from the Users, Teams, Roles, Dynamic Roles, and Contacts tabs, then click the Add button. When you're finished adding recipients, click Save
 .
. -
To remove recipients, click the Trash icon
 next to the recipient, click Yes in the Delete Record dialog, then click Save .
 -
To enable the SMS notifications option, enable the toggle next to SMS.
-
To add recipients, click the + to the right of Recipients. Select a user from the Users, Teams, Roles, Dynamic Roles, and Contacts tabs, then click the Add button. When you're finished adding recipients, click Save
 .
. -
Click Save
 to finalize your changes.
See also:
Configuring Notification Settings